HTB Sherlock Safecracker Writeup

Intro
I last visited Hackthebox quite a while ago, and I was delighted to see that the team has added cool challenges for our blue teamers, too! They are called HTB Sherlocks.
In each Sherlock, you are tasked to complete various forensic tasks and answer a set number of questions to piece together all the evidence in the aftermath of a hacker attack. You win if you answer all of them. 🙂
I decided to give one such task, Safecracker, a go.
Task
We recently hired some contractors to continue the development of our Backup services hosted on a Windows server. We have provided the contractors with accounts for our domain. When our system administrator recently logged on, we found some pretty critical files encrypted and a note left by the attackers. We suspect we have been ransomwared. We want to understand how this attack happened via a full in-depth analysis of any malicious files out of our standard triage. A word of warning, our tooling didn’t pick up any of the actions carried out - this could be advanced.
We are set on the mission to investigate a ransomware attack. This is going to be fun!
The authors of this task do not lie; there is a live ransomware executable (although not particularly harmful) within the archive, so be sure not to open and RUN it on your Windows host.
We are given a safecracker.zip archive with the evidence to start. Password is hacktheblue

The safecracker.zip contains another archive, WinServer-Collection.zip, and a DANGER.txt file. We will disregard the latter one as we are trained professionals! Password from the nested archive is *HA1Ty1sLQEq.
The WinServer-Collection archive contains a bunch of files. By the looks of it, this is a forensic file dump of the affected machine made by KAPE.
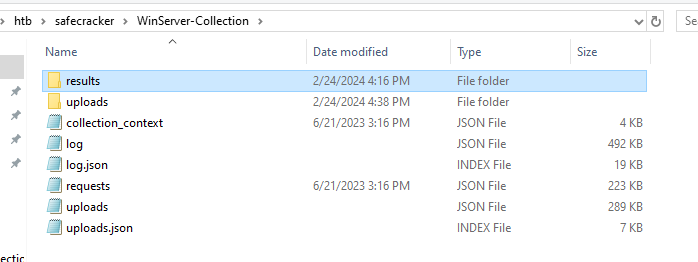
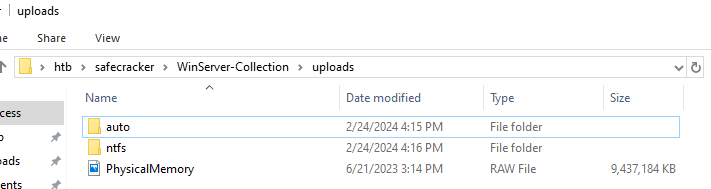
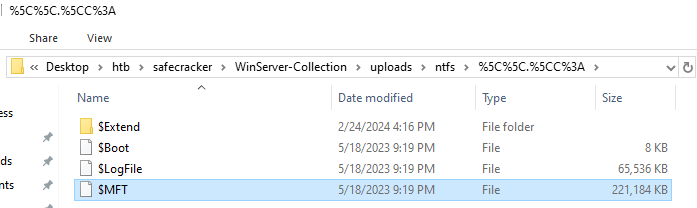
We are only interested in the contents of the uploads folder. It has the filesystem dump in an auto folder, NTFS metadata in an ntfs folder, and a physical dump of the affected server’s RAM. This should be enough to kick our investigation off.
Questions list
I solved all the questions in a non-linear order, so I will present them as is in this writeup.
You can refer to the table of contents below to navigate to the desired question number.
- Which user account was utilised for initial access to our company server?
- Which command did the TA utilise to escalate to SYSTEM after the initial compromise?
- How many files have been encrypted by the the ransomware deployment?
- What is the name of the process that the unpacked executable runs as?
- What is the XOR key used for the encrypted strings?
- What encryption was the packer using?
- What was the encryption key and IV for the packer?
- What was the name of the memoryfd the packer used?
- What was the target directory for the ransomware?
- What compression library was used to compress the packed binary?
- The binary appears to check for a debugger, what file does it check to achieve this?
- What exception does the binary raise?
- Out of this list, what extension is not targeted by the malware?
.pptx,.pdf,.tar.gz,.tar,.zip,.exe,.mp4,.mp3 - What compiler was used to create the malware?
- If the malware detects a debugger, what string is printed to the screen?
- What is the contents of the
.commentsection? - What file extension does the ransomware rename files to?
- What is the bitcoin address in the ransomware note?
- What string does the binary look for when looking for a debugger?
- It appears that the attacker has bought the malware strain from another hacker, what is their handle?
- What system call is utilised by the binary to list the files within the targeted directories?
- Which system call is used to delete the original files?
FS Analysis w/ Autopsy
Let’s focus first on the filesystem dump of the server. We will use an open-source Autopsy toolkit for this task.
Autopsy Case Setup
To use all instruments provided by the Autopsy, we first need to create a new ‘case’ and send our files to the analysis.
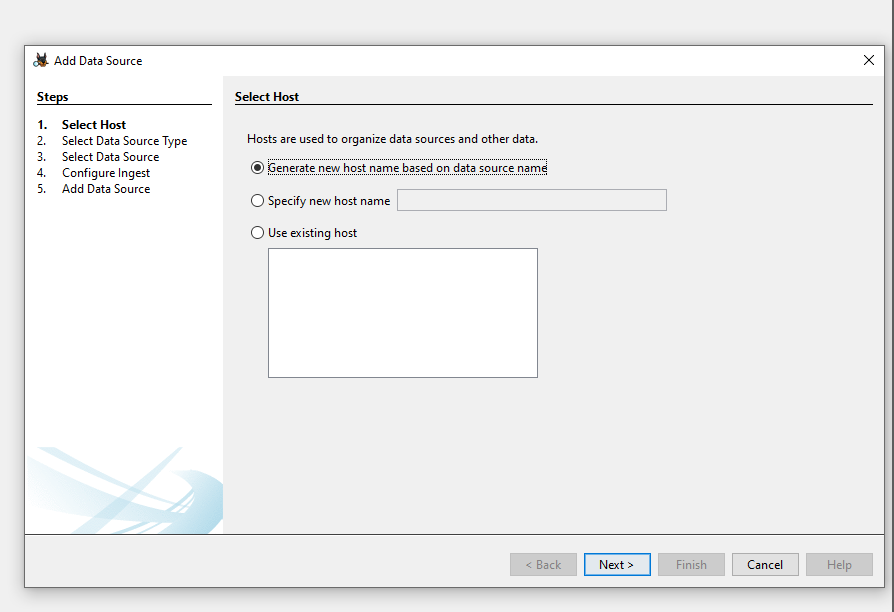
Launch Autopsy and hit the New Case button.
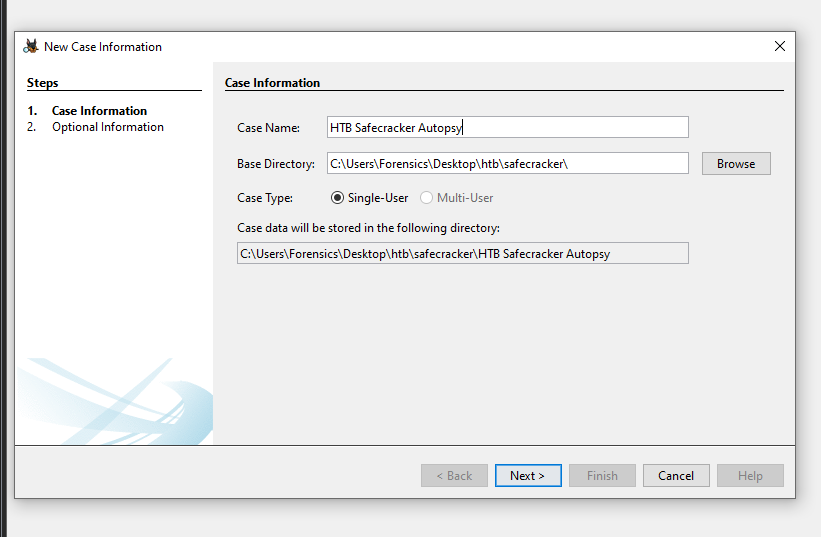
Fill in basic case information. You can leave all fields besides the Case Name blank / default.
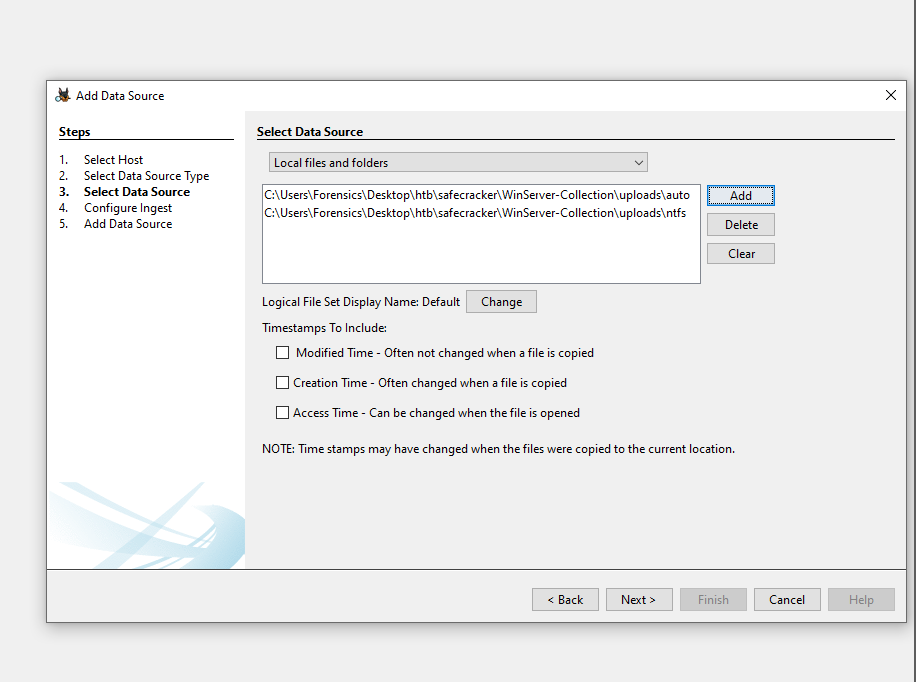
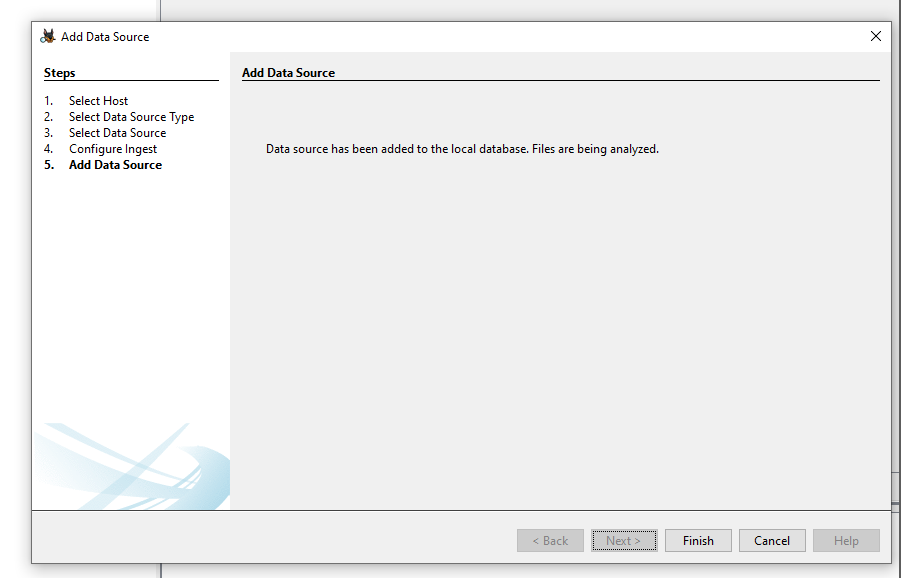
Import data for analysis. Since our KAPE dump is just a set of uploaded files, we will select the Logical Files source and specify our ntfs and auto directories:
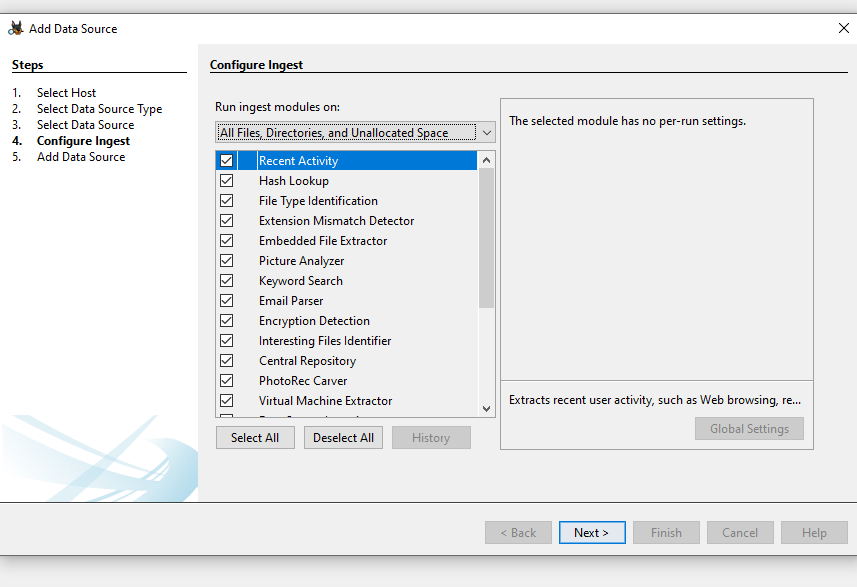
Leave default injestors and click the Next button.
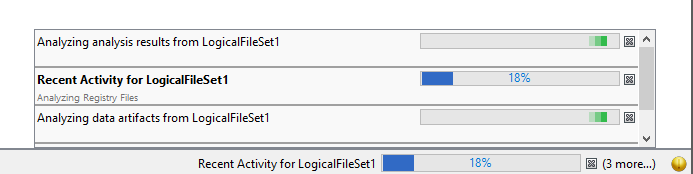
Files will now be automatically sent for analysis.
You can view the analysis progress in the bottom right part of the Autopsy Window.
Once done, we will be presented with a nice list of artifacts in the panel on the left.
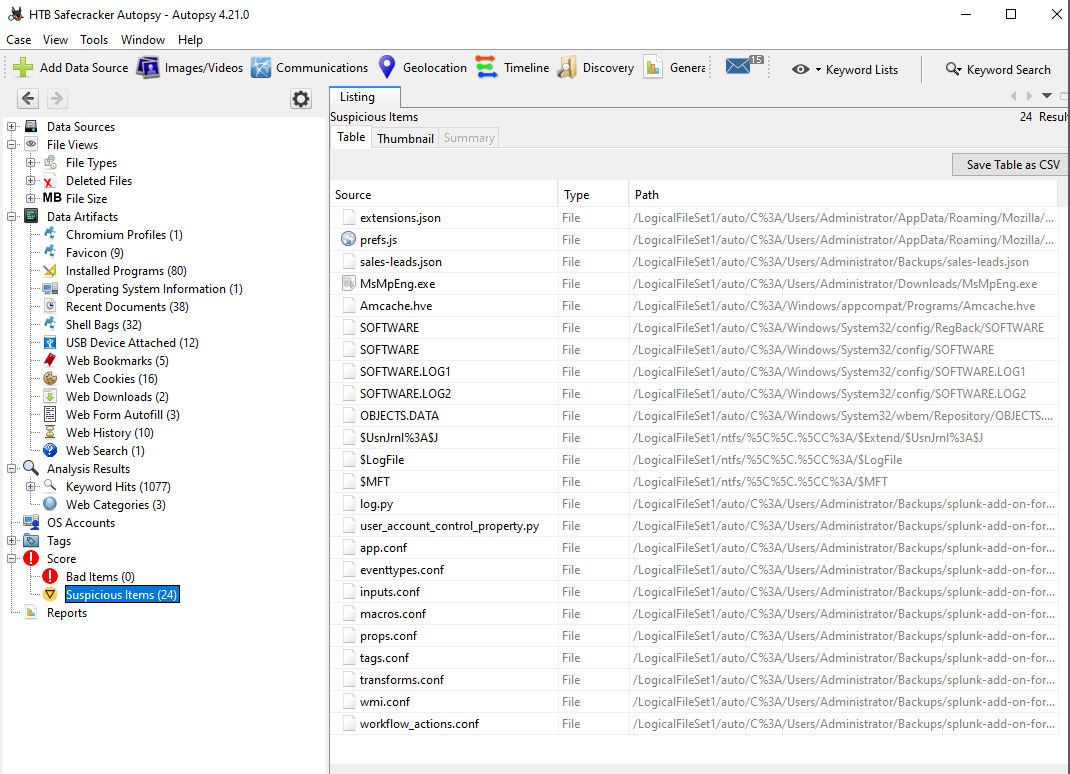
Let us now dig through the evidence to answer some questions.
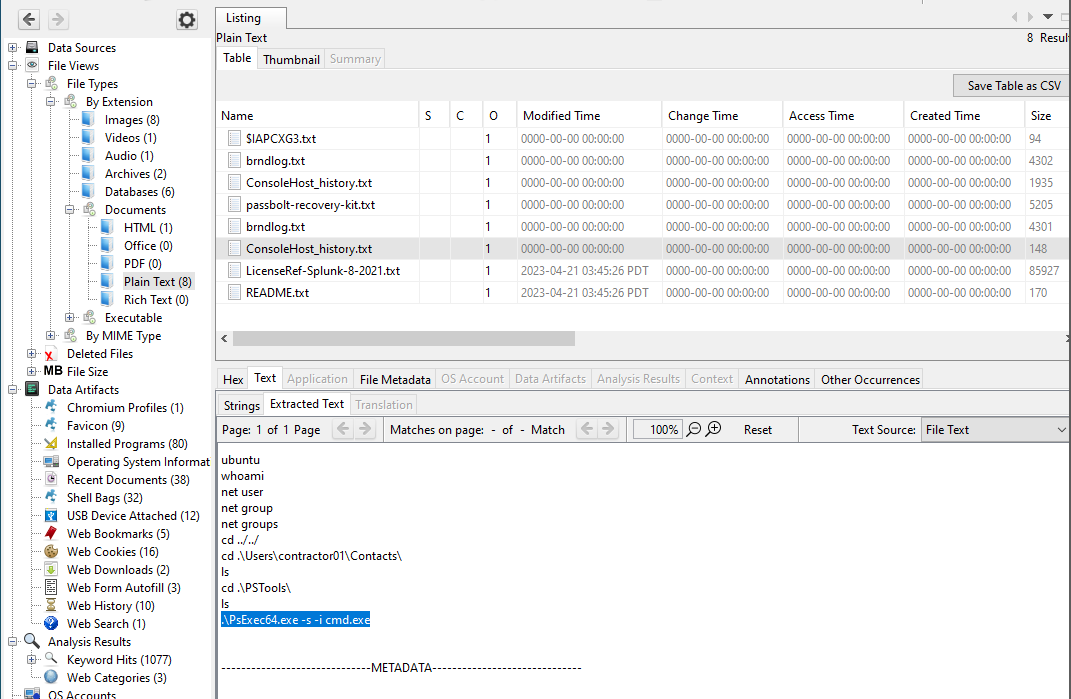
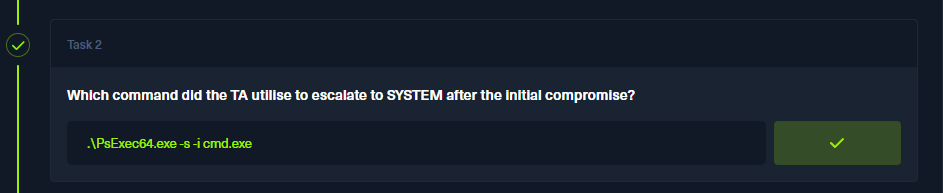
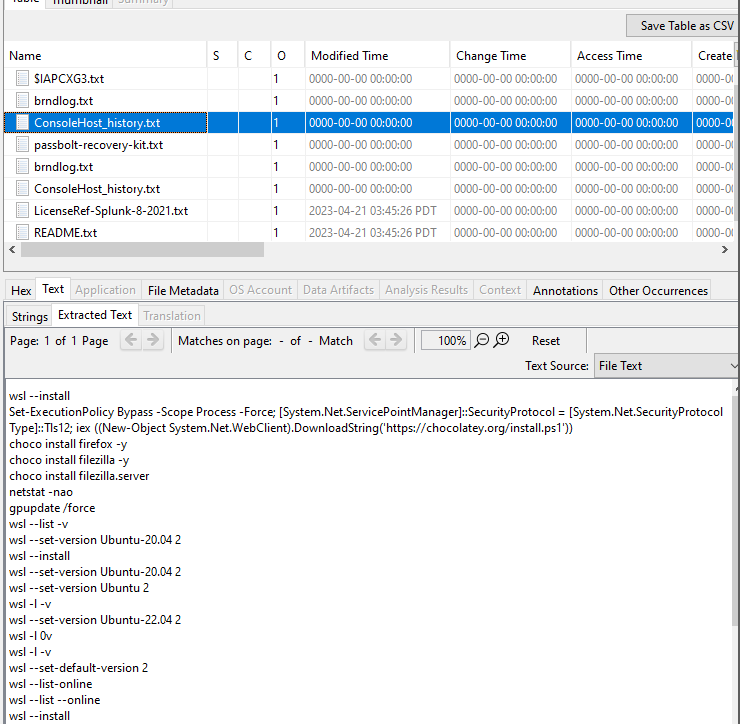
Q 2: Which command did the TA utilize to escalate to SYSTEM after the initial compromise?
Browsing through the Autopsy analysis, you may find a ConsoleHost_history.txt file in the AppData directory of the contractor01 user. It is used to record the command history of users’ PowerShell sessions.
The attacker used PsExec to elevate to a SYSTEM prompt with the -s flag.
Q 1: Which user account was utilised for initial access to our company server?
Based on the evidence above, we can confirm that the contractor01 account was used in the attack chain. It is also the only non-standard user account in this particular Windows system.


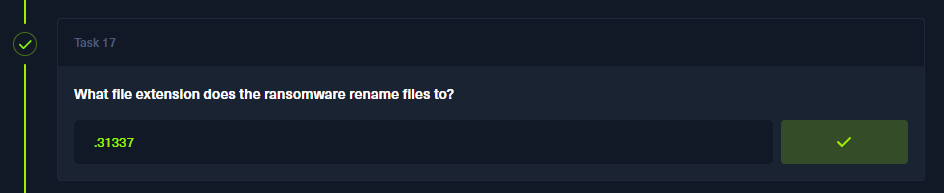
Q 17: What file extension does the ransomware rename files to?
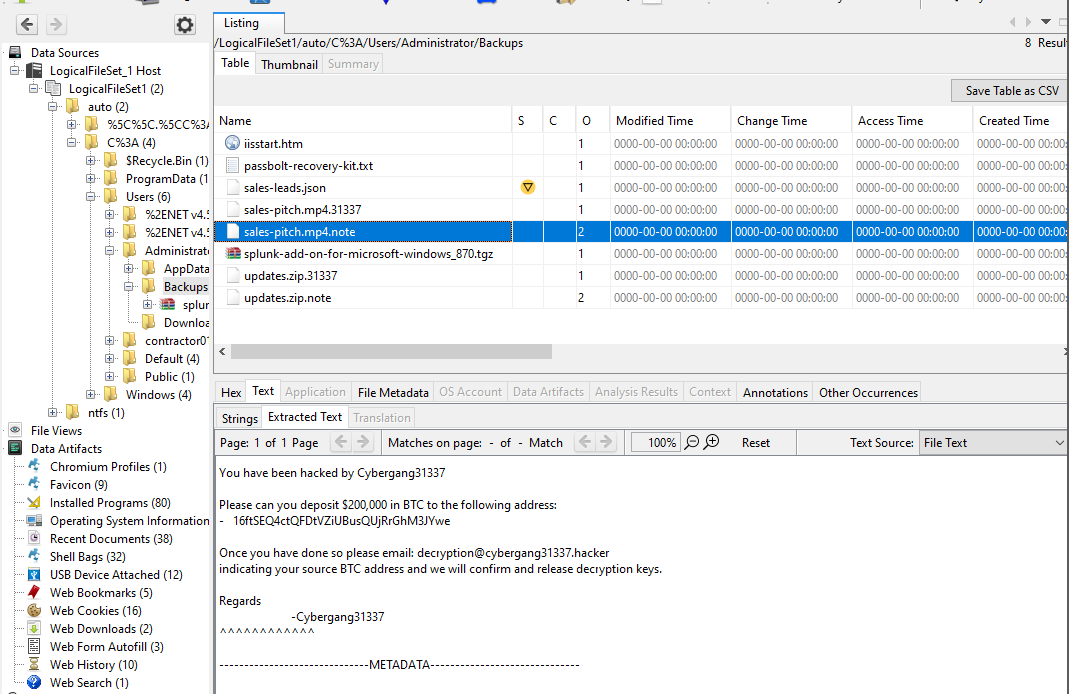
Also, by browsing the file system, we can find a lot of occurrences of files with duplicate names that have extensions .31337 and .note each. Looks like this is the work of the ransomware. The former is the encrypted original file, and the latter is the note from the ransomware group.

Q 18: What is the bitcoin address in the ransomware note?
By inspecting the .note file, we can obtain the Bitcoin address.

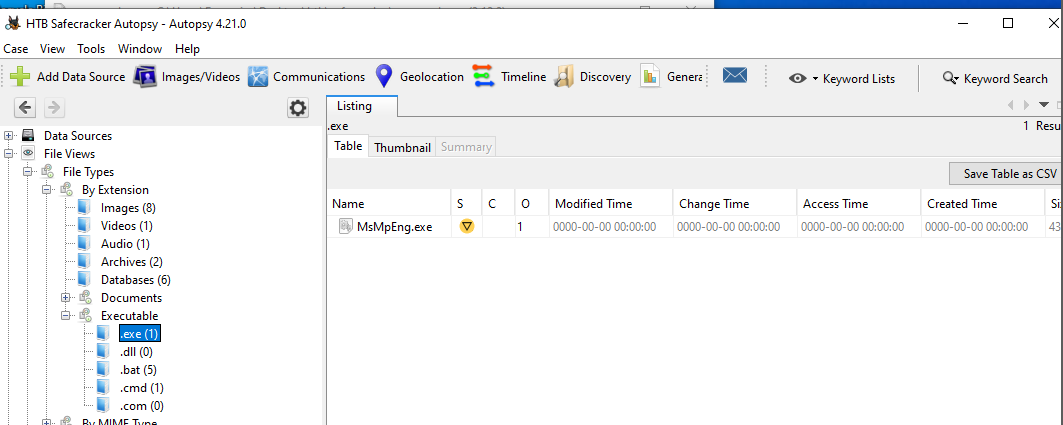
Q 14: What compiler was used to create the malware?
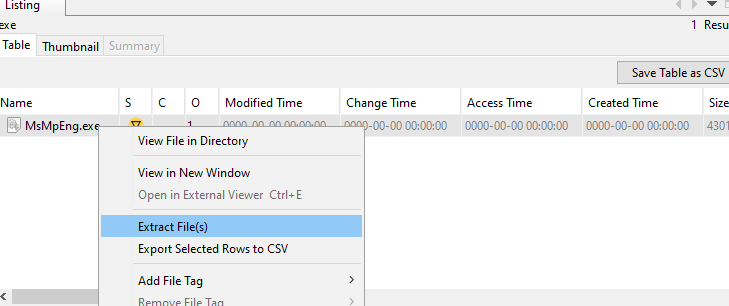
We can also find the malware executable in the Autopsy files. This is the only .exe file in the dump; it is named as a legitimate Microsoft Defender executable (!!!) and flagged as suspicious by the tool.
Looking at its bytes and strings also shows that this is, in fact, an ELF executable for Unix systems, not a PE. This smells fishy. I have never heard of Defender being ported to Linux!
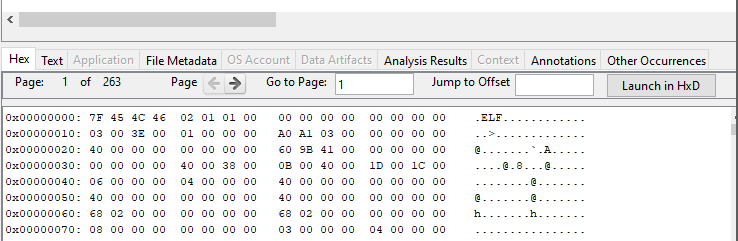
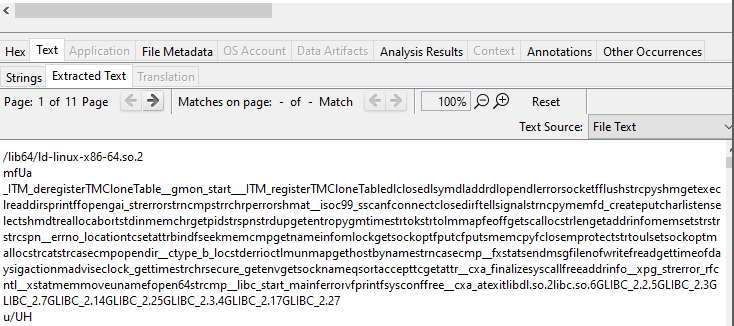
Also, judging by the multiple occurrences of GLIBC references, it is safe to assume that this ELF was compiled with GCC.

Current theory — this malware is being run in a WSL. Judging by the Administrator’s PS history, it was installed recently.
We can extract the executable for future analysis by right-clicking and hitting the Extract File(s) option.
This is everything useful that can be extracted with the help of the Autopsy. There are still some FS-related questions left to be answered, though.
Parsing the NTFS metadata
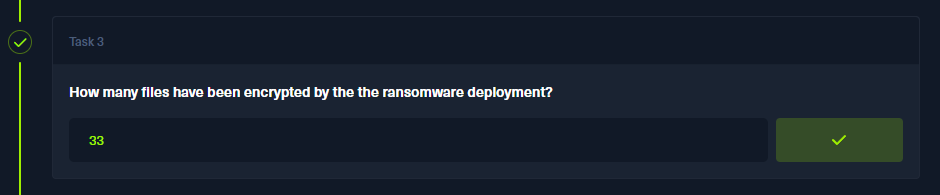
Q 3: How many files have been encrypted by the the ransomware deployment?
We know that the encrypted files have the .31337 extension. By looking for the files with this extension, we can only find 3 in the existing file dump. But, the answer form requires two digits. We have to be creative with this task.
1
2
3
PS C:\Users\Forensics\Desktop\htb\safecracker\WinServer-Collection> Get-ChildItem -Filter "*.31337" -Recurse | Measure

Count    : 3
Remember the ntfs folder of the dump? It contains a file named MFT. This is the Master File Table in NTFS that includes the metadata (thus a filename) of every file on the system. We can parse it to find all of the encrypted files!
We can confirm this theory by opening the file in the hex editor and searching for the .31337 substring in it. The MFT is stored in Windows standard UTF-16-LE encoding, so we must account for it.
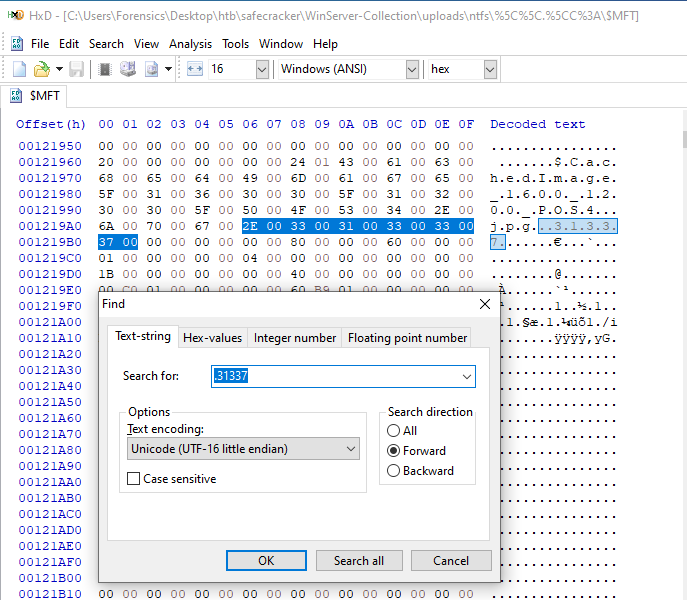
Let’s automate the count by writing a simple Python 3 script, which will search for all instances of the extension bytes in the MFT, extract them, and print out the unique ones.
Note: I am not an expert in the MFT format, so I can’t explain the two garbage bytes at the start of the filename that I had to filter out. It looked like a sequential ID of some sort. There are probably tons of readily available solutions that parse this data correctly, but we don’t need them for such a simple task.
1
2
3
4
5
6
7
8
9
10
11
12
13
14
15
16
17
18
19
20
21
22
23
24
25
26
27
28
29
30
31
import re

MFT_PATH = 'C:/Users/Forensics/Desktop/htb/safecracker/WinServer-Collection/uploads/ntfs/%5C%5C.%5CC%3A/$MFT'

with open(MFT_PATH, 'rb') as f:
    mft_data = f.read()

filenames = list()

ransom_extension = '.31337'.encode('utf-16-le')

# search for utf-16 string that ends with the ransom extension
for match in re.finditer(ransom_extension, mft_data):
    # get its index in the mft
    filename_end = match.end()
    # reverse search the next null byte (the start of the string)
    filename_start = mft_data[:filename_end].rfind(b'\x00\x00')
    # copy the match into the list of all filenames
    # skip first 4 bytes
    # 2 bytes = \x00\x00
    # 2 bytes = garbage (?) file ID in mft?
    filenames.append(mft_data[filename_start+0x4:filename_end].decode('utf-16-le'))

# filter unique filenames
filenames = set(filenames)

for filename in filenames:
    print(filename)

print(f'Found {len(filenames)} unique encrypted filenames')
Our script returns 33 unique filenames:

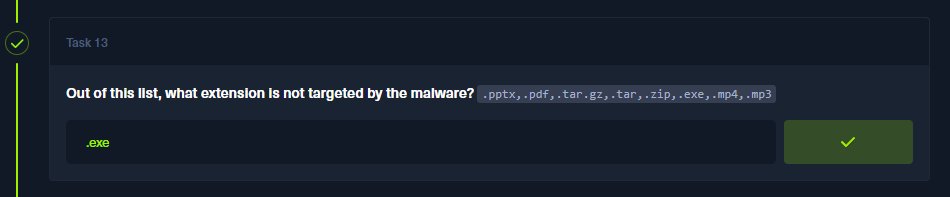
Q 13: Out of this list, what extension is not targeted by the malware? .pptx,.pdf,.tar.gz,.tar,.zip,.exe,.mp4,.mp3
.exe is missing from the list, returned by the Python script.
Reverse-engineering the packer
Let us now move on to reverse engineering the MsMpEng.exe. We will use IDA Free for this task wink, wink, nudge, nudge.
The actual reverse engineering part is pretty trivial. The binary has symbols, is relatively small by comparison, and has every important bit of code gathered in the main function. The main function is passed as a first argument in the rdi register to the __libc_start_main function. You can find the x64 bit calling convention for Linux explained here.
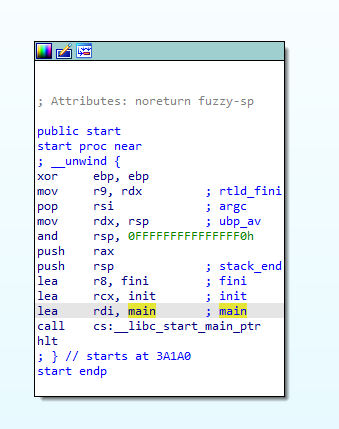
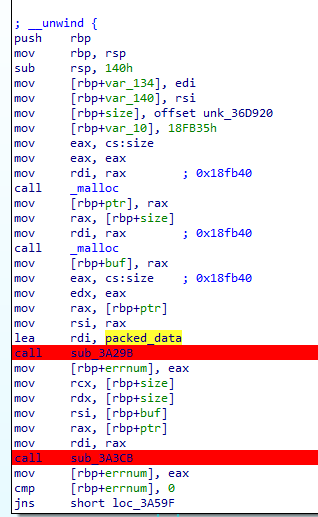
The main function itself is pretty straightforward. First, it allocates a memory buffer of 0x18fb40 bytes twice. Then, it passes those allocated buffers as an argument to the two subroutines marked red alongside some offset (renamed as packed_data) that is very obviously the encrypted/encoded main executable.
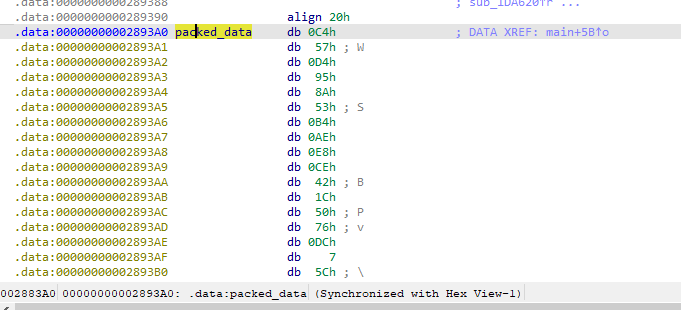
Data at packed_data offset is listed below. The data is rebased to the 0x2893a0 address. The physical offset in the file is indicated in the bottom left corner and is actually 0x2883a0:
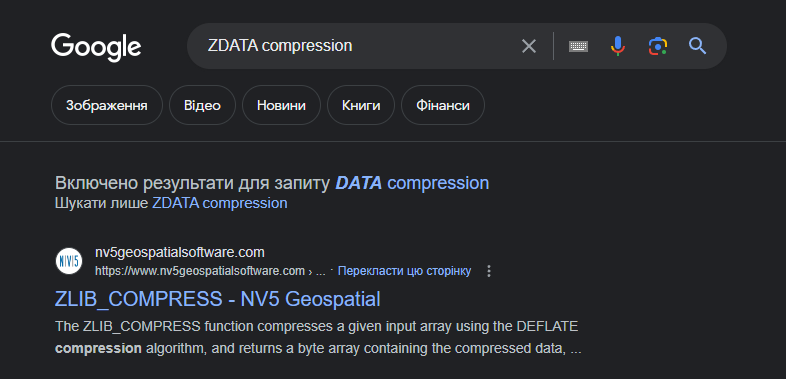
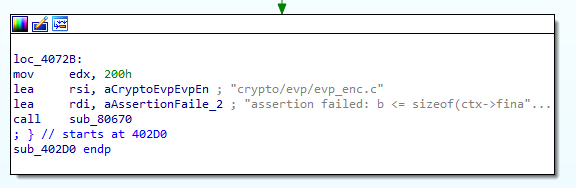
Q 10: What compression library was used to compress the packed binary?
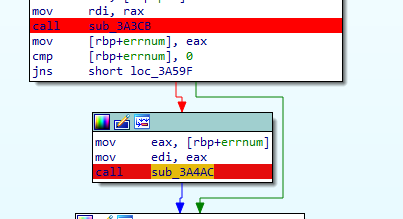
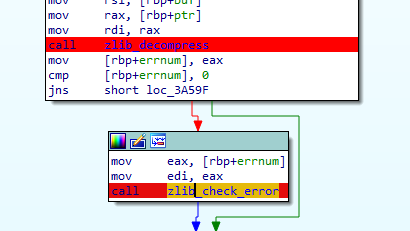
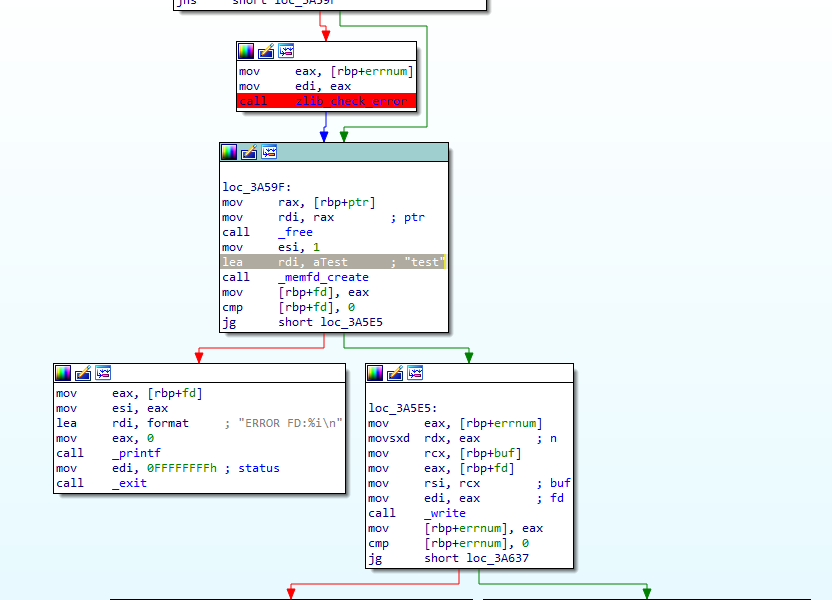
After the main block listed above, the function branches into the call to the sub_3a4ac function, which checks for particular errors with unique names.
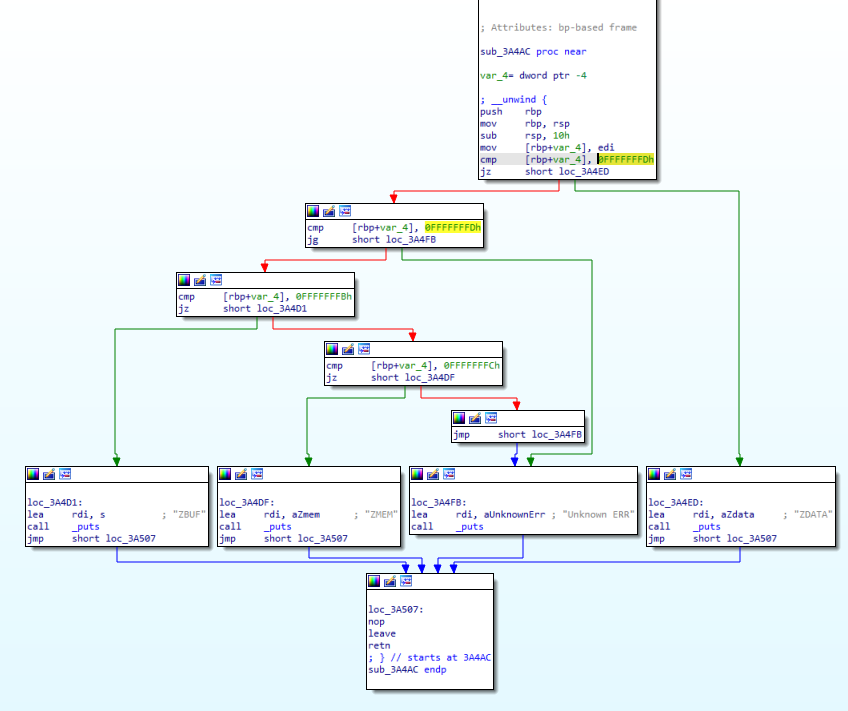
A quick Google search for ZDATA leads us to the zlib C library, which is used to decompress the nested malware.
We can safely rename these functions now.
Q 7: What was the encryption key and IV for the packer?
But what about the first sub_3a298 function, called before the zlib_decompress?
Well, it decodes two hex-encoded strings, suspiciously being 64 and 32 bytes long each. In the decoded form, they will be 32 and 16 bytes long, accordingly. These are the exact lengths of the key and IV used by the 256-bit AES algorithms.

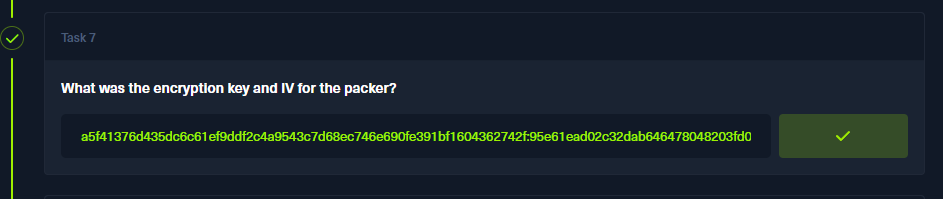
Q 6: What encryption was the packer using?
Our observations are further confirmed by the other functions down the line.
They contain numerous references to crypto/evp module (OpenSSL C code).
But how do we determine the exact encryption algorithm used by the malware? I just went the dumb route and tried all the common ones. I wrote the script below to extract the packed data from the offset 0x2883a0 of length 0x18fb40 (both determined in the earlier steps); use the key and IV to decrypt it and decompress it with zlib.
Zlib fails at the decompression step if it doesn’t find a valid header in the data supplied to it. It is a reliable way of determining whether we are on the right track. A couple of tries and fails later, we got a working combination. The algorithm used was AES-256-CBC.
1
2
3
4
5
6
7
8
9
10
11
12
13
14
15
16
17
18
19
20
from Crypto.Cipher import AES
from binascii import unhexlify
import zlib

key = unhexlify('a5f41376d435dc6c61ef9ddf2c4a9543c7d68ec746e690fe391bf1604362742f')
iv = unhexlify('95e61ead02c32dab646478048203fd0b')

data_offset = 0x2883a0
data_size = 0x18fb40

cipher = AES.new(key, AES.MODE_CBC, iv)

with open('C:/Users/Forensics/Desktop/htb/safecracker/MsMpEng.exe', 'rb') as f:
    encrypted_packer_data = f.read()[data_offset:data_offset+data_size]

packer_data = cipher.decrypt(encrypted_packer_data)
data = zlib.decompress(packer_data)

with open('C:/Users/Forensics/Desktop/htb/safecracker/packer_data', 'wb') as f:
    f.write(data)
The extracted packer_data file is also an ELF executable. We will return to it later.
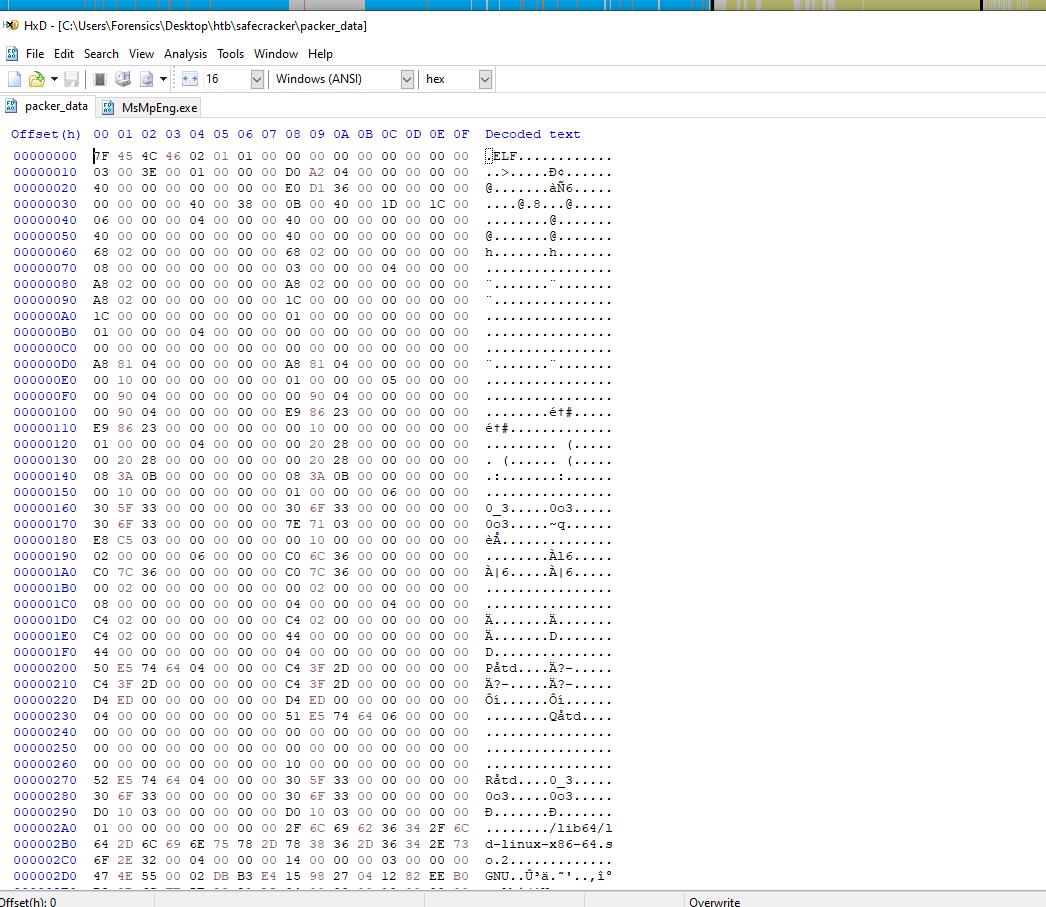
Q 8: What was the name of the memoryfd the packer used?
Let’s get back to the main function of the packer. We are not done with it yet. After the decryption and decompression, the app creates a memory file descriptor called test and writes the data to it, basically loading the executable into the packer’s memory.
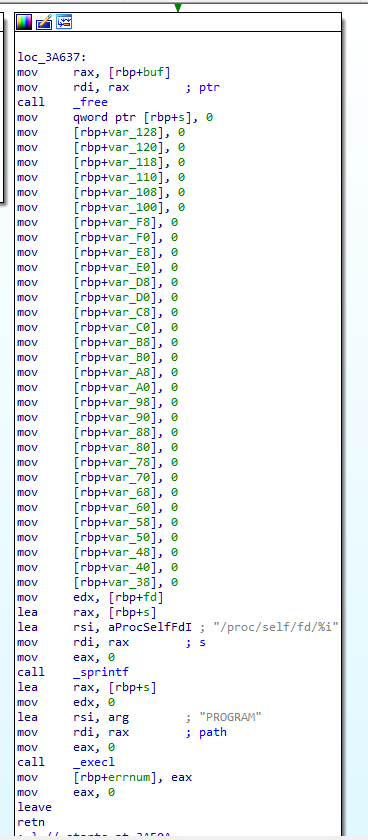
Q 4: What is the name of the process that the unpacked executable runs as?
Finally, the packer starts the unpacked malware in memory by its full path in the proc filesystem (/proc/self/fd/{FD_NUM_RETURNED_BY_MEMFD_CREATE}) via the execl call. The name of the process is set to PROGRAM string:

That’s packer dealt with. Let’s now move on to the actual malware we have previously extracted through the Python script.
Reverse-engineering the malware
The malware ELF also has all the symbols!
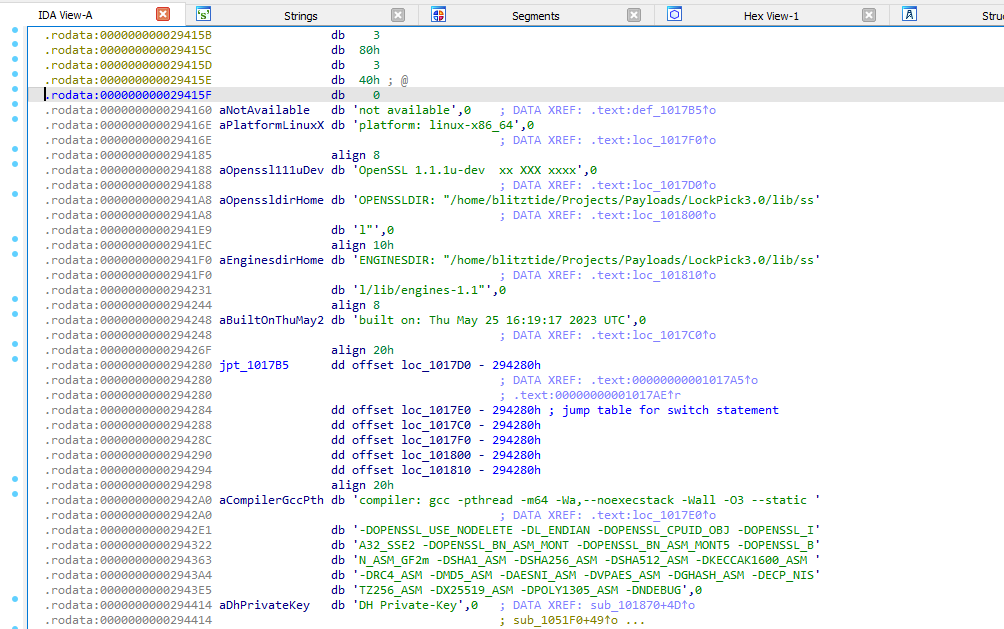
Q 20: It appears that the attacker has bought the malware strain from another hacker, what is their handle?
Looking through all of the strings in IDA, we can spot some debug info left by GCC. This info includes the full path to the OpenSSL library used to link this malware. The path has the original hacker’s nickname, blitztide
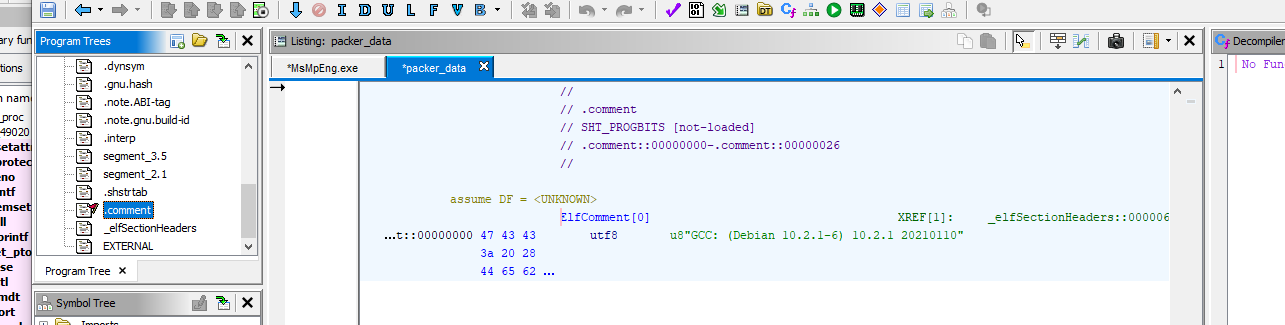
Q 16: What is the contents of the .comment section?
Unfortunately, I had a little trouble using IDA to reconstruct the ELF sections, so I had to use Ghidra to view them. After the automated analysis, we can view the .comment section by selecting it in the top left list. This also confirms our theory that the binary was compiled with GCC.
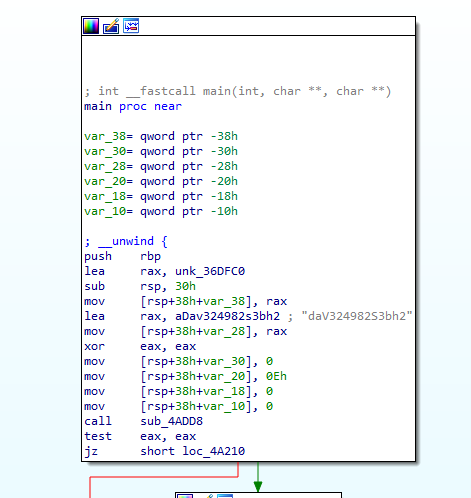
Q 5: What is the XOR key used for the encrypted strings?
I don’t know what happened here. I believe all strings in this binary should’ve been encrypted with XOR, but they are all cleartext. The key is located at the very start of the main function.
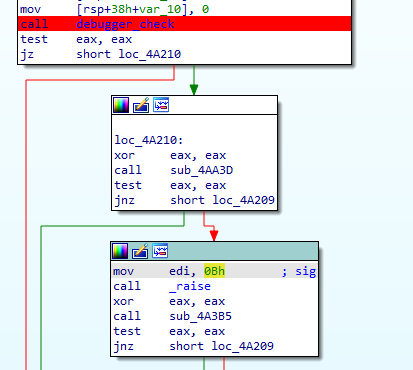
Q 15: If the malware detects a debugger, what string is printed to the screen?
The app checks for the debugger presence at the very start of the execution in the sub_4add8 function.

If the debugger is found, it prints *******DEBUGGED******** string with the puts() call:
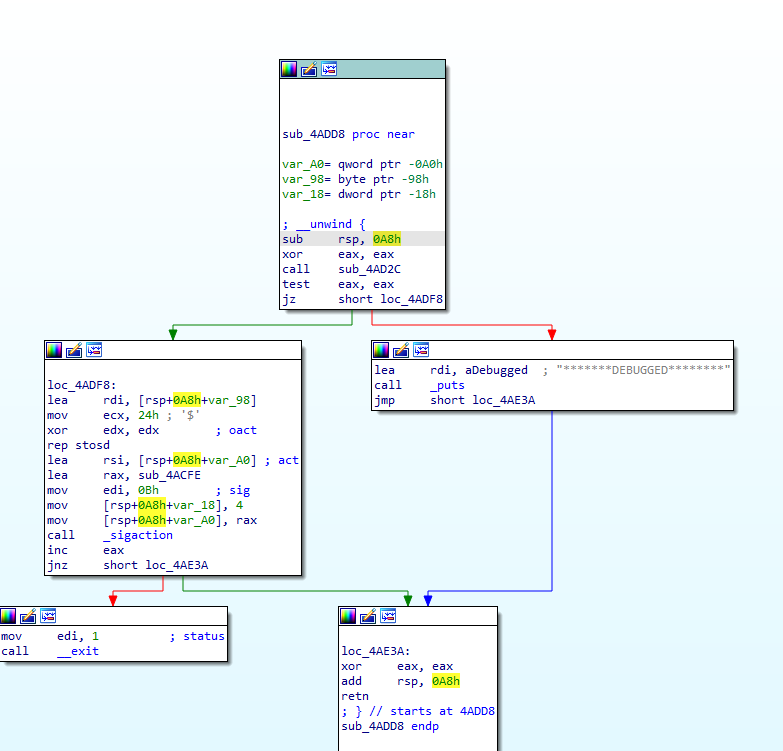
Let’s rename the sub_4add8 function to debugger_check
We need to analyze this function a bit more.
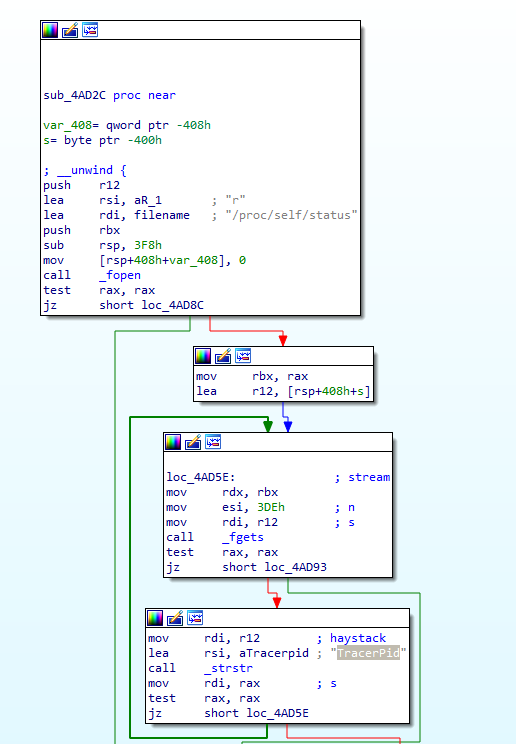
Q 11: The binary appears to check for a debugger, what file does it check to achieve this?
All checks are made inside the nested sub_4ad2c function of the debugger_check function:
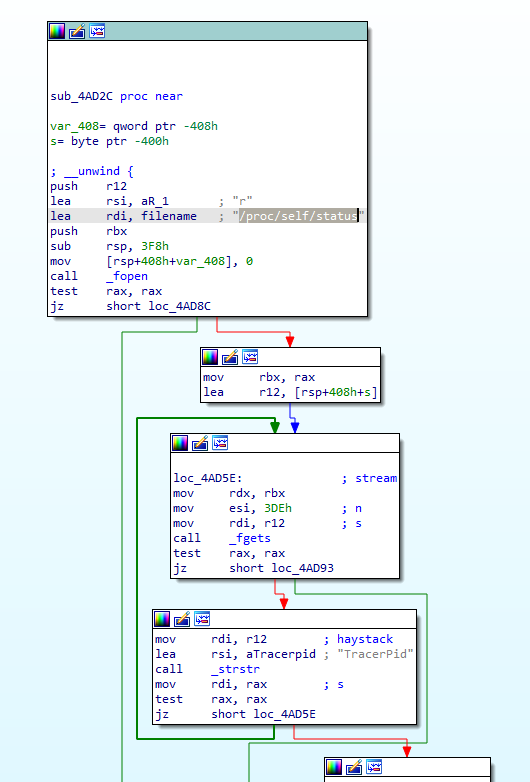

Q 19: What string does the binary look for when looking for a debugger?
The app checks for the TracerPid string inside the /proc/self/status file:
Q 12: What exception does the binary raise?
If the app finds a debugger, it will raise a 0xb exception, i.e., SIGSEGV

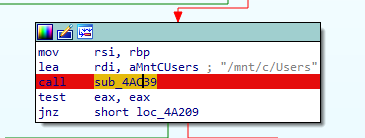
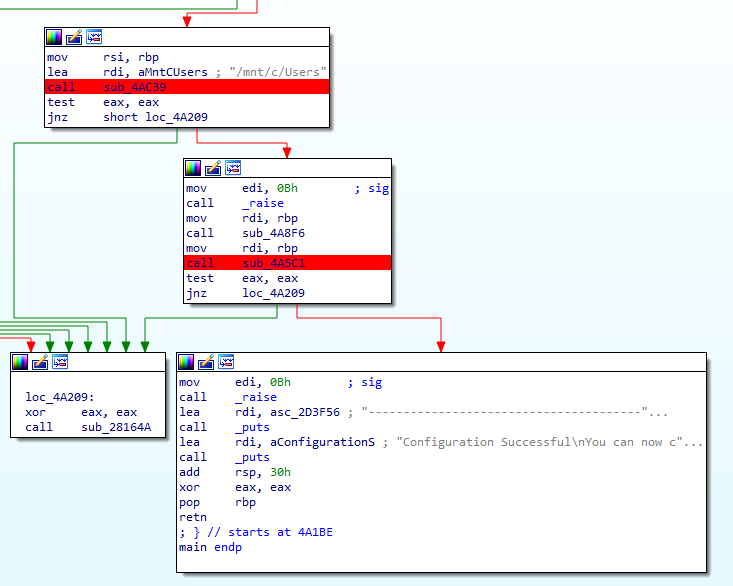
Q 9: What was the target directory for the ransomware?
The main function of the malware then proceeds to gather the list of all files in the /mnt/c/Users directory in the sub_4AC39 function. This mount point will be mapped to C:/Users path in the WSL, further confirming our theory about malware running in the Ubuntu container.

Q 21: What system call is utilised by the binary to list the files within the targeted directories?
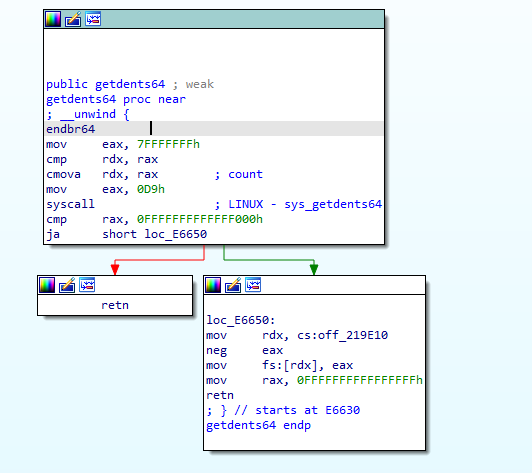
As per the above screenshot, the app uses a libc function _readdir to list the files in the directories. We can inspect the implementation of this function in the libc on our Linux machine to find the respective syscall.
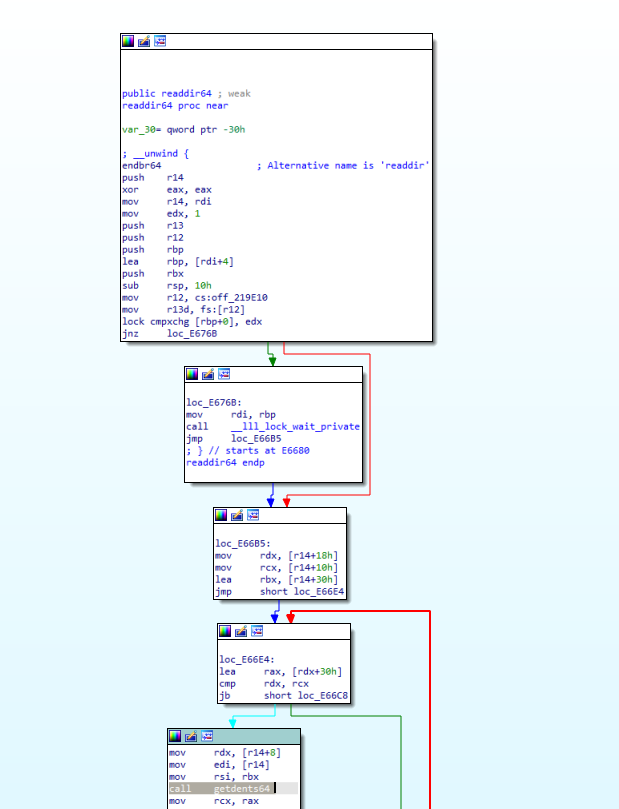
The syscall used is 0x0d9, getdents64
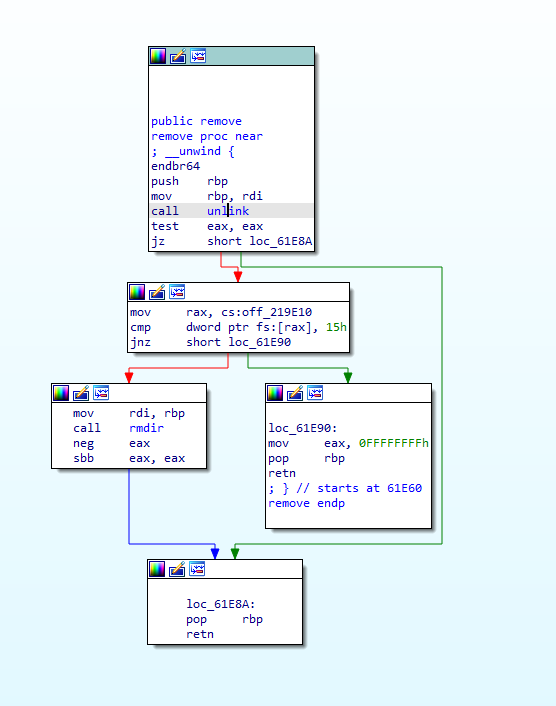
Q 22: Which system call is used to delete the original files?
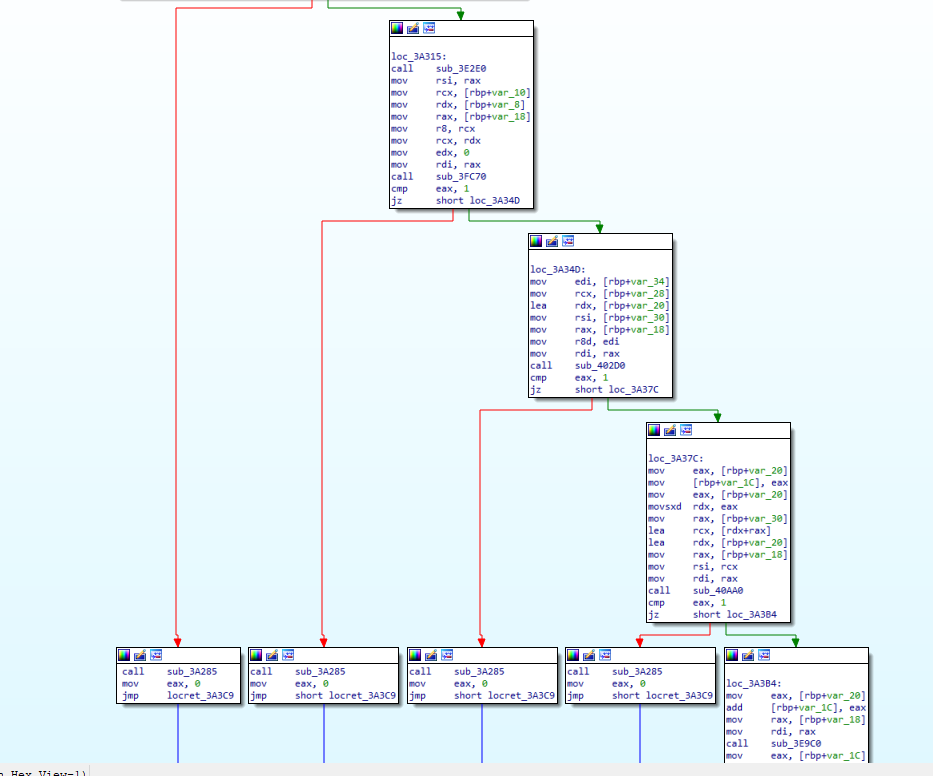
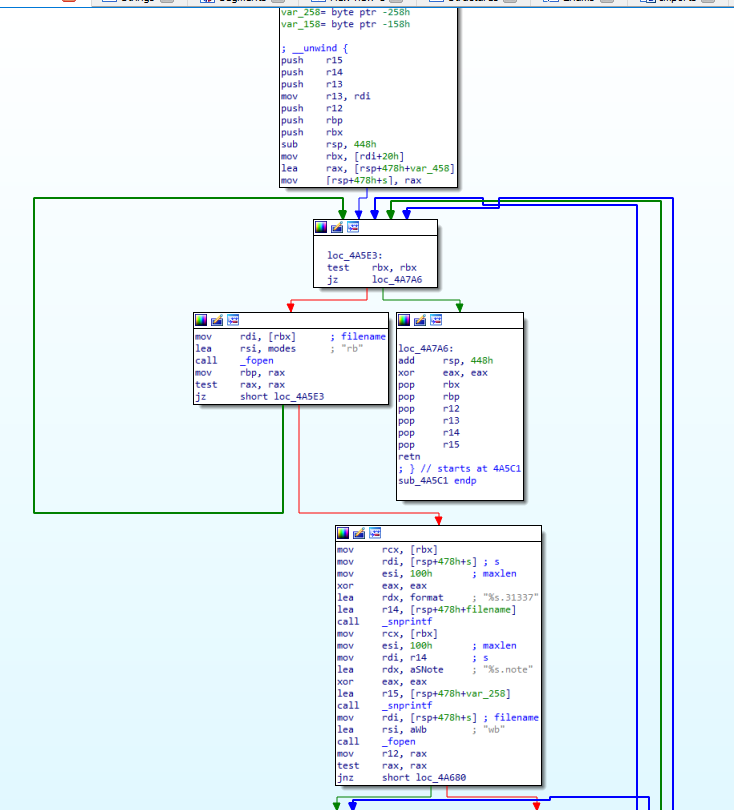
The actual encryption of the files happens in the sub_4A5C1 function:
We can see how the files with .31337 and .note extensions are being created.
The app attempts to remove the original file at the end with the libc function _remove.
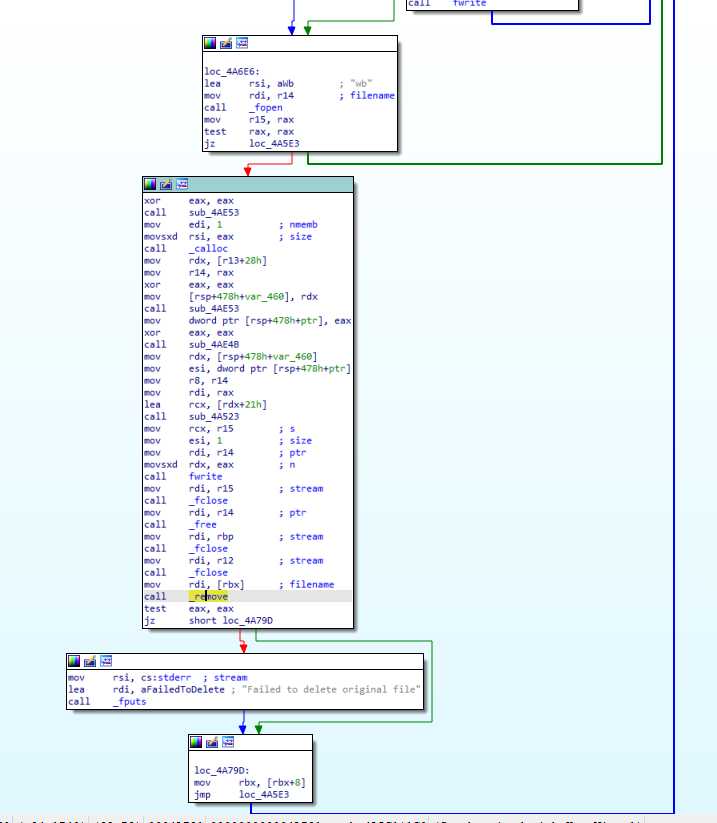
Again, we can disassemble the remove function from the libc.so.6 on our machine in IDA to get the syscall name. The syscall used is unlink
Conclusion
So yeah, that was the Safecracker Sherlock! Quite a big one if you ask me :D But it is not that hard if you take your time and approach each task individually. I hope you’ve learned something useful today! See you in the following articles!